Bone Combs

What is a “bone” comb and why are they so great ??

In pre-historic times the best combs were actually made from bone (fish bone) as well as antelope horn, elephant tusk and goat horn. These materials were hard and smooth. When carved and polished they produced beautiful seamless combs. They were also anti-static and heat resistant.

The creating of these combs was very labor intensive. Once the right material was selected, the overall shape of the comb was carved. Then each tooth was carved, filed, sanded and polished over and over in a 18 step process done by hand. The bone comb is so finely finished that it does not snag, rip or split the hair.

When the use of animal materials was banned, there was no comb that did not damage hair. The beauty industry was desperate to find a suitable substitute since they were very dependant on bone combs for their work. After some time, a new material was formulated from a 100% organic resin material. This material is hard and smooth just like bone, and can be hand carved, sawed, and polished to exemplify all the unique features of the original bone comb. They are also anti-static and will not melt when used with hot styling tools.

There has been some hesitation to use “bone” when referring to these combs as they are not truly made of bone in modern days. Some companies refer to them as “bohn”.  Various other forms of bone descriptions abound. The rich caramel color make  bone combs easily recognized. They age beautifully and will turn to a dark mahogany color over time. When wet there is a distinct fragrance.
I used a bone come while i was in beauty school and I really loved it, it really worked the way this article says it does.  No melting when using it while flat ironing and no static and no snagging your hair while detangling, its a great comb!  They are not cheap, but well worth their cost (hey, they prevent split ends by comb).  I will be purchasing one (or 2) this week, i will let you all know how it works out when i recieve it. I will be ordering it from hairsense.com which is where i got this information.
Have any of you ever used a bone comb?  What did you think of it? Rate, Comment, SUBSCRIBE!!!


Be aware some manufacturers are making plastic combs of the same color and calling them “bone” combs. The fakes are easy to spot since they are usually priced around $1.00 and are very flexible with obvious seams to tear hair.


Source: http://www.Hairsense.com


Hair Maintenance

Maintaining Those Tresses 

This is a topic that I think would be beneficial to a lot of us regardless of whether we are natural or relaxed.  The one thing our hair has in common is that we must maintain it if we want it to look nice. The the steps to maintain  hair are simple, but I’d like to break them down for you.

  1. Shampoo Before we begin to shampoo our hair we should gently finger comb through it to loosen up tangles and residue.  When washing our hair, treat it as if it were fine silk—Delicately.  Allow the water to completely saturate your hair before adding shampoo.  Leave hair hanging down and gently massage in shampoo starting at the roots and working down to the ends.  Never pile shampoo on top of your head.  This is a good time to give your scalp a nice massage using your fingertips, refrain from using your nails as this may irritate your scalp.  The massage will get your blood circulating as well as help lift product and residue from your scalp.
  2. Conditioning Conditioner creates shine and preserves hair health by giving it smoothness and protecting against damage.  For volume, condition only the middle and ends of your hair, where it’s most susceptible to damage.  For shine, condition the entire strand.  Do it every time you use shampoo and more often if you want.  A good time to detangle your hair is after the conditioner has sat in your hair for the time you’d like and right before you rinse it out.  Its okay if you want to section your hair and plat or twist it as you detangle, you can rinse without taking your plats/twists out, this way your hair is already detangled when you begin to dry it.When deep conditioning find a conditioner that says to leave it on for at least 10 minutes.  Try to squeeze or ring as much water from your hair using your hands then section your hair into 4 sections and shingle the deep conditioner onto your hair, cover with a plastic cap.  When possible sit under a hair dryer for 10-15 minutes then rinse with luke warm or cold water if you can stand it.  If  a hair dryer is not available for you, leave the plastic cap on for a while until the heat from your body naturally heats up (usually an hour or longer) or try the Hair Therapy Wrap, then rinse as stated.
  3. Drying Don’t rub your hair with a towel or twist it tightly into a turban.  Wet hair is delicate and breaks easily.  Pat it gently and squeeze it with your towel or use a super absorbent towel.  Sometimes I use a cotton t-shirt or paper towels and just blot the access water out (also called plopping).  If you are using a blow dryer or hair dryer make sure to protect your hair with a leave in conditioner and a high smoke point oil such as sunflower oil or avocado oil, grape seed oil also has a high smoke point.  If possible don’t blow dry your hair.

TIPS:

When adding products we should always layer them, moisturizer and conditioner then oils and butters.  I normally add my products on wet or damp hair.  Never put oil on first unless you don’t intend to add any other products in some cases you can mix oil into your moisturizer/conditioner and add it all at once.  Oil seals in moisture and that is why you add it last to lock in all the good stuff and seal your cuticle shut.

When trying a new product for the first time, it’s a good idea not to mix it with other products, so that you can get a clear result.  Try your new products at least 2 or 3 times before giving up on it(unless you have an allergic reaction or your hair feels brittle, dry or limp afterward), some products take a few applications before you start to see results.  Read the instructions as well as the description of what the product actually does.  Find out what your hair likes and doesn’t like, for example my hair does not need protein, anytime I used a conditioner or shampoo with extra protein my hair would feel very brittle and hard. I finally realized that it was the protein after doing a little research.  When your hair already has enough of something naturally you don’t need to add more.  Here is a little test you can do to determine what your hair may or may not need:

Pull a wet strand of your hair from your head or capture one of your shed hairs. Pull on it steadily. (Wrap both ends around the index fingers of both hands to make sure it doesn’t slip off)
♣ If the hair stretches, but shrinks when you let go: your hair has enough protein
♣ If the hair stretches a lot, and does not shrink back, it lacks protein.
♣ If it breaks, it needs moisture.
♣ If it seems to stretch and break, then try both protein and moisture treatments.

I will discuss protein and moisture treatments another time.

Let me know what you think or if you have any questions!  Rate, Comment, SUBSCRIBE!!!

Product Review

I wanted to find a product that has a good hold and doesn’t cause flakes, also its a plus if it mixes well with other products.  I decided to try the Olive Oil Twist & Loc Gel by Africa’s Best.  Here are the

directions straight from the jar:  Directions: For Comb Twists, Double Strand or Free Hand Twists. Before applying TWIST & LOC GEL gently cleanse hair with Orcanics by Africa’s Best® Olive Oil

Shampoo, then condition with Olive Oil Deep Conditioner.  Towel dry, section hair and apply TWIST & LOC GEL. Twist hair with comb or fingers, for best results, set twists under a warm dryer.  To touch-up twists or locs at new growth, section hair and apply a small amount of gel.  Re-twist or palm roll to touch-up twists and locs.  Set under a dryer for best results.

I did not follow the directions exactly.


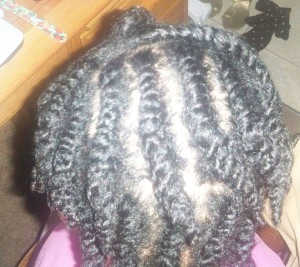
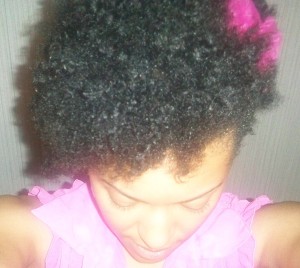
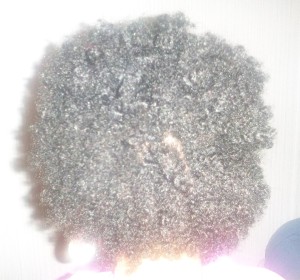
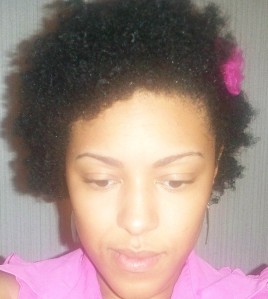
I used this on damp freshly washed hair with only my leave in mixture(see my hair regimen for mixture) already applied. The texture of the gel wasn’t as thick as i expected to be and not as thick as other gels such as eco styler or pro styler.  I decided to do flat 2 strand twists all over for a twist out.  I was in the middle of a 30 day no comb challenge so I did not use a comb or brush at all.  I finger parted my hair to do the twists and i applied enough gel to almost saturate each twist with the product. 

Another reason i like to finger part is so that it’s easier to hide the parts once you take the twists out.  I wrapped my hair with a satin scarf and slept on the twists overnight, in the morning they were dry.  The twists felt soft and there were no flakes or crunchy feeling. When i took them out my hair was soft but, it felt like there was a film covering it, almost a gritty like feel, kind of hard to explain.  There was really no hold and i didn’t see much definition.  

I did notice some shine, but as far as the hold, i probably wouldn’t use this gel for a twist out again although i may try it one more time this time using a comb to detangle and possibly doing regular 2 strand twists and not specifically for a twist out, just to see if that changes the outcome.  I’ll probably end up using it to slick my hair back or to lay down my daughters baby hair.

I wouldn’t recommend this product for twist outs because although it was soft and added shine, it did not hold or define my hair the way I would like it to.  Maybe if I sit under the dryer it may make a difference as well as using their other products to cleanse my hair (don’t see myself going that far).

Remember everyone’s hair is different so I am just giving you my opinion based on what it did for my hair, it may give you different results.  If you don’t like to use mineral oil this is not a product for you because mineral oil is the 3rd ingredient.  I purchased this product myself ($3.99) and I am not being paid by anyone to do this review.

Please let me know if you have tried this product and what your results were.  Let me know if you did something different for it to come out better.

If you liked this review please comment, rate and SUBSCRIBE!

Castor Oil (WOW!)

Castor oil is by far one of my favorite oils to use in my hair and in doing some research I found out that it has benefits beyond what I would have ever imagined!  I’ve posted some information i got from skinverse.com, if you’d like to read even more about castor oil, just click the link.

1. Castor Oil cures acne

The Ricinoleic Acid in castor oil works to inhibit many viruses and bacteria, and as castor oil is able to penetrate skin tissue deeply, this makes it an effective treatment for acne.

To treat acne, dab a hot damp washcloth all over your face in the evening before you go to bed. The heat will gently open the pores on your face. After this, massage a little castor oil gently into the skin. Leave on overnight. Repeat this daily for 1 to 2 weeks to see results. You can also repeat this twice in the day, once at night and once in the morning.

2. Castor Oil keeps the skin looking smooth, youthful and unlined

Castor oil’s ability to penetrate more deeply than any other essential plant oil make it an excellent way to keep skin looking youthful and fresh. Castor oil works better than any store-bought anti-ageing creams.

The best way to use castor oil is to rub in a small amount over your face and around your eyes before bed. This may be hard to do at first because castor oil is extremely thick and sticky. Therefore, rub the oil in as thoroughly as possible and then pat your face gently with a tissue to get rid of the excess. This will keep wrinkles at bay. Be sure to use only cold pressed castor oil that is hexane free. Any other kind may clog your pores.

Castor oil is found in several anti-ageing creams, wrinkle creams and undereye creams.

Reviva Labs Eye Complex Firming Cream - castor oilReviva Labs Eye Complex Firming Cream burt's bees radiance day cream - castor oil

Burt’s Bees Radiance Day Creme

Borba Advanced Aging Recovery Crème -castor oilBorba Advanced Aging Recovery Crème
Commercial anti-ageing creams that contain castor oil

3. Castor Oil breaks up external and internal scar tissue, and prevents new scars from forming

Castor oil’s unrivaled deep tissue penetration help to soften and remove both external and internal scars, like those that form following surgery.

Castor oil will penetrate deep into the tissues to slowly break up scar tissue. Amazingly, castor oil is able to distinguish between healthy cells and abnormal ones. In healthy cells, castor oil will detoxify and stimulate them, while increasing circulation. In abnormal cells like scar tissue and growths, castor oil will instead work to aggressively dissolve cells thanks to the solvent property of castor oil.

To break down internal scarring, soak a piece of clean cloth with castor oil and place it over the scar area for an hour or two each day. You can also simply rub castor oil over the scar each day. More serious internal scarring will take longer to break down.

On another note, castor oil can also prevent scars from forming in the first place. Applying castor oil over cuts or scrapes will promote excellent skin healing.

Remarkably, applying castor oil after surgery, cuts or wounds will also minimize scar formation. This could be because of castor oil’s ability to increase our body’s lymphocytes (because of this, castor oil packs are especially useful for people with HIV or AIDS). Lymphocytes, or white blood cells, appear to regulate wound healing. And studies have shown that T lymphocytes may play an important role in wound healing and scar formation. Babies and young children have naturally higher levels of lymphocytes than teenagers and adults, which could be one of the reasons why our skin healed with much less scarring when we were younger.

Several commercial scar reduction creams also contain castor oil (eg Scar Zone, Scar Repairex). However, they also contain more chemicals than they do castor oil!


5. Castor Oil thickens eyelashes and eyebrows

Rub a little castor oil over the base of your eyelashes before bed. This prevents thinning and promotes rapid growth, leading to thicker and fuller lashes. In fact, many commercial products for eyelashes contain castor oil.

To thicken sparse eyebrows, rub a little castor oil over the brow line before bed.

6. Castor Oil prevents hair loss and regenerates hair

The anti-bacterial and anti-fungicidal properties of Ricinoleic Acid in castor oil protects the scalp and hair from infections which can cause hair loss. The Omega-9 fatty acids in castor oil also nourish the hair and prevent the scalp from drying.

Rubbing castor oil on your scalp and the roots of your hair will regenerate new hair growth within months. This will also thicken thinning hair.

7. Castor Oil keeps hair looking soft and shiny

Castor oil is a humectant as it draws moisture into the hair and skin. Applying castor oil on hair will keep it looking soft, shiny and strong.

8. Castor Oil softens thick calluses and removes corns

Castor oil application will soften any rough or thickened skin, including calluses and corns. To treat corns, apply castor oil over your feet and put cotton socks on before going to bed. (Incidentally, sleeping with castor oil socks on will also soothe painful heels and foot pain.)

9. Castor Oil cures skin infections like athlete’s foot and ringworm

Apply a castor oil soaked cloth on the affected area. If it is small enough, a band-aid with a few drops of castor oil can be used instead.

10. Castor Oil prevents stretch marks

Rub a small amount of castor oil over your stomach and thighs daily to prevent stretch marks during pregnancy or periods of weight gain.

11. Castor Oil will remove moles and warts

Rub castor oil into moles or warts every night. The moles (or warts) will start to shrink over a few weeks, and continued use will eventually remove the mole without any scarring. Complete removal may take 2-3 months, but this slow healing will also ensure there is no “hole” in your skin. (The surgical removal of moles will often leave a hole where the mole was. This indentation can often be permanent.)

12. Castor Oil will remove age spots (liver spots)

Rub castor oil into your age spots every night. The age spot will lighten over time, and continued use will eventually remove the age spot completely.

Find the complete article part 1 and 2 at Skinverse.com

Time for Protective styles!

♥Protective Styling♥

Winter is almost here and the cold weather means dryness for our hair and skin.  We do have options to protect our fragile hair from the elements though.  Most of you may have heard of a “protective style” before, but for those of you who haven’t I will tell you what a protective style means to me.  It’s a style that completely protects the ends of your hair which are the oldest part therefore the easiest to damage.  It also means that you are not manipulating your hair very often, giving it a chance to rest and grow.  The more we manipulate our hair, the more room we allow for breakage.  Things as simple as brushing and combing our hair can cause breakage.  Last but not least there is no heat involved in a protective style as far as I’m concerned.  Heat damages and so to protect my hair I do not apply heat to achieve my protective style nor do I use heat while my protective style is in. The less damage that you cause to the ends of your hair, the less you have to trim it therefore you will start to see your hair grow longer and longer.  If you really want to see growth, in my opinion, protective styling is a great way to go!

Protective styles can look many different ways and can even be camouflaged with a wig or a weave.  A bun is probably one of the easiest protective styles i can think of, but with short hair it’s not always achievable.  I prefer cornrows, you can also do flat twists and 2 strand twists, what ever is easiest for you to achieve, just know that when it is cold out, your hair is not going to keep the moisture the same as it does in warmer weather so protective styling is ideal.

It’s very important to keep our hair moisturized on a regular basis, this is every 2 to 3 days for me, but could be more often depending on your type of hair.  Very tightly coiled hair has a tendency to be more dry because the moisture has to find its way through the coil, so if this is your type of hair make sure that you are pulling the product through to the ends of your hair and it may help even more if you apply your moisturizer in sections using the shingling method which is like parting your hair in 4 sections then taking smaller subsections of each and adding the product one subsection at a time (if you’ve ever had a relaxer done professionally they “shingled” the chemical in using a small applicator brush).  When your hair is in a protective style that you cannot take down nightly such as braids or a sew in weave, just apply your moisturizer carefully focusing more on your hair and less on your scalp. If you can find a moisturizer in a spray pump bottle that would be ideal.  Find a good moisturizer that works for you and make sure you apply it when needed.  It’s always good to follow-up with an oil to seal in the moister when possible.

Here are a few pics of my protective style, I did this Monday (6 days ago)and have been keeping it under my satin bonnet all week because I haven’t had to go anywhere special.  When I leave the house I just slide my stocking cap back to the crown of my head and put on a knit hat or beanie. I plan to keep it in for 14 days or more if possible.


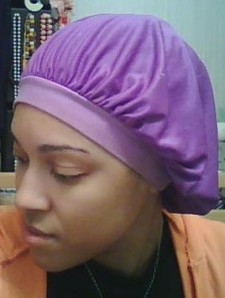
Be sure to protect your hair while you sleep with a satin scarf, bonnet, or pillow case(NEVER COTTON!!).  The slightest brush against other fabrics can cause damage.  I put my bonnet on the headrest in my car to keep my hair from breaking in the back.  If you can put a satin cover over your couch cushion where you sit most that can benefit you greatly. It may seem like a bit much, but if you want to retain length stopping breakage and split ends is a necessary step.

Let me know what some of your favorite protective styles are. Please leave a comment and rate this post!

A breakdown of oils for our hair

Essential Oils & Carrier Oils

This is a guide to essential oils & carrier oils for kinky-curly, or natural hair of African descent. Your hair can benefit from two types of oils. These two types of oils are essential oils and carrier oils. Essential oils are fragrant oils that are actually the concentrated essence, or ‘life force’ of a plant. Essential oils are light and do not feel like an oil. They evaporate quickly. You would mix essential oils with a carrier oil before you put it on your hair to prevent skin irritation. Carrier oils are oily in consistency. They can be oil from a vegetable, a fruit, a nut, or even a seed.

Essential Oils for Natural Hair

All essential oils are not created equal. Look for the highest grade you can find. Only buy Complete Essential Oils or Genuine Grade A Essential Oils. These are oils that contain the most natural oil and the least amount of additives and chemicals. Some essential oils for the hair are:

Basil♦stimulates the scalp.

Cedarwood ♦an astringent, antiseptic, balances production of sebum, and stimulates the scalp. Sebum is your hair’s natural oil.

Chamomile ♦adds sheen and conditions the hair.

Eucalyptusremoves dandruff and has antiseptic properties.

Frankincense ♦used to get rid of dry scalp.

Jasmine ♦often used for fragrance.

Lavender ♦used for dandruff and fragrance.

Lemon ♦cleanses the hair and scalp and improves hair elasticity.

Myrrh ♦used for dry hair and scalp.

Orange Oil ♦helps the hair by regulating the production of sebum. Sebum is your hair’s natural oil.

Palmarosa ♦helps the hair by regulating the production of sebum. Sebum is your hair’s natural oil.

Patchouli ♦treats dandruff and oily hair.

Peppermint ♦stimulates the scalp.

Rose Oil ♦used as fragrance and to sooth the scalp.

Rosemary Oil ♣(DO NOT USE IF YOU ARE PREGNANT!) stimulates the scalp and treats dandruff.

Sandalwood Oil ♦an astringent, an anti-inflammatory, as well as an antiseptic. Use sandalwood oil to soothe a dry and irritated scalp.

Tea Tree Oil ♦used to treat dandruff and kill lice. Tea tree oil balances production of sebum and stimulates the scalp. Sebum is your hair’s natural oil.

Ylang-Ylang ♦balances production of sebum, stimulates the scalp. Sebum is your hair’s natural oil.

Carrier Oils for Natural Hair

You can use carrier oils with essential oils or by themselves. A popular, readily available, and inexpensive carrier oil is extra virgin olive oil. Other carrier oils for the hair are:

Almond Oil ♥a light, non greasy, fast absorbing hair conditioner.
Apricot Kernel Oil ♥used for dry hair. It makes your hair shiny and moisture rich. It contain a large amount of linoleic acid which is essential for cell health.
Avocado Oil ♥a light, protein and vitamin rich. It include vitamin A, vitamin E, vitamin D, and potassium.
Castor Oil ♥a humectant. Humectants attract moisture into your hair.
Grapeseed Oil ♥odorless and vitamin rich. It makes your hair shiny and moisture rich. It contain a large amount of linoleic acid which is essential for cell health.
Hazelnut Oil ♥fast absorbing and medium weight. It contain a large amount of linoleic acid which is essential for cell health.
Jojoba Oil ♥simular to sebum, which is your hair’s natural oil. It can be used with or without an essential oil. It is often used 50/50 with another carrier oil to massage the scalp. Continue reading

Breast Cancer Awareness

In honor of Breast Cancer Awareness month I thought it would be appropriate to post an article on the subject matter.

A large study of women in Washington State finds that those who take fish oil supplements have a lower risk of breast cancer.  Other studies had shown a diet rich in essential fatty acids from fish to be protective against heart disease, but this is the first to suggest that fish oil may help prevent breast cancer. The study followed more than 35,000 post-menopausal women who answered questionnaires about their use of “specialty” supplements (nonvitamin and nonmineral).  After six years, researchers determined that those who took fish oil were about half as likely to develop the most common form of breast cancer.  Several other supplements were looked at, but only fish oil was associated with a lower risk of breast cancer.

Fish oil may suppress breast cancer by inhibiting inflammation, according to Emily White, PhD, an epidemiologist at the University of Washington and a coauthor of the study.

For more than 25 years the National Breast Cancer Awareness Month (NBCAM) organization has promoted breast cancer awareness and raised funds for research into the cause, prevention, and cure of the disease.

Sources: “Fish Oil May Fight Breast Cancer” by Nathan Seppa. Science News 7/8/10 ♦ “Fish oil Supplements Linked to Reduced Breast Cancer Risk” by Sharon Kirkey, Canwest news Service 7/8/10 ♦ “Specialty Supplements and Breast Cancer Risk…” by T.M. Brasky etal., Cancer Epidemial Biomarkers Prev, 7/10

My Current hair Regimen

When i first did my b/c (big chop), I had watched thousands of hours of youtube natural hair videos and had been inspired to cut my relaxed hair off.  It was like i never realized there was a whole community of people who were “going natural” and were on “natural hair journeys”, while I was just tired of the way my hair felt and looked with a relaxer, anyway I want to share my hair regimen with you 8 months post b/c .  I could have very easily become a product junky had I took in every single persons advice that I watched on youtube, but I knew better.  I wanted to find a product that worked for my hair.  I chose Taliah Waajid’s Black earth Products. Here is my Regimen

  • Wash every two weeks with Taliah Waajid’s Total body black earth shampoo, I condition using Taliah Waajid’s Enhancing herbal conditioner, then pat my hair dry with a soft baby towel and add her Protective mist bodifier. Recently I have been using a recipe I learned from a woman on youtube named Kimmaytube. It contains 1 part Aloe vera gel, 4 parts leave in of your choice,  2 parts Castor oil and 1 part Jojoba oil (I use olive oil). I section my hair a shingle this mixture through each section.  I usally style my hair while its wet or just pull it back and let it air dry.  I like to use Crinkles & Curls styling lotion (also made by T.W.) I find that it give me a great hold and leaves my hair feeling super soft when it dries. I really like that it does not cause flakes or the white stuff that gel sometimes leaves.
  • If my hair is not in a protective style I will wash it once a week
  • I have Co-washed in the past, but found that its not necessary for my hair
  • Between washes i saturate my hair using a spray bottle with a mixture of glycerin and spring water then I shake it out and apply extra virgin coconut oil throughout.
  • I try to keep my hair in a protective style most of the time only letting it out for special occasions and to wash or condition.
  • I deep condition once or twice a month with Elasta Qp’s DPR-11, this stuff works wonders for my hair and I like it because it is a true deep conditioner.
  • Tip-True deep conditioners should say to leave it in for at least 15 minutes in the directions and most times also say to sit under a dryer

Let me know if you have any questions or if you want to share your regimen with us.

I want to feature YOU on my blog!

So i’m sitting here trying to think of some ideas for my blog while i don’t have any subscribers yet and the thought came to me to add a section where i can feature natural beauties! You can be featured for a style or for transitioning or maybe you just want to drop some knowledge on the rest of us. Whatever the case may be send me an email with pics and/or a description of why you want to be featured. Send emails to: iprefer2benatural@yahoo.com and make sure to put “Feature me” in the subject line.

Here is a guide you can follow to help you get started

1. Tell us why you decided to go natural

2. Tell us when you did your big chop or when you started transitioning

3. Tell us if anyone influenced your decision and how

4. Tell us how you felt the first time you felt your natural hair

For styles

1. Tell us how you achieved this style (if you did it yourself)

2. Tell us what products you used

3. Tell us where you are going

For transitioners

1. Tell us when you decided to transition and how long its been

2. Tell us how you have been managing the 2 textures so far

3. Tell us if you plan to do the B/C (big chop)

4. Tell us if you are being influenced by anyone to make this choice for your hair

Transitioning or New to Natural hair and frustrated?

Are you transitioning and have come to the point where you feel you can’t do anything else with your hair? Have you just done the BC (big chop) and can’t figure out where to go from here? I’d like to hear about some of your frustrations. I want us to be able to help each other because the natural hair journey has many bumps and potholes in the road. I’d like to share what I’ve learned and hopefully learn even more from others.

Please leave a comment and let me know your thoughts or questions on the subject. Please subscribe to keep up with the up and coming articles.